Note: You can install Workflow 10 on a machine running Workflow 8.3 and later without migrating your workflows. The installation process will automatically uninstall the previous version of Workflow and upgrade to Workflow 10. If you are upgrading your system from Workflow 8.0 to Workflow 10, please see the Workflow Migration Guide.
- You can install Workflow in one of two ways:
- Insert the Laserfiche Workflow Installation CD into your computer. A
 menu displaying installation options should appear. If it does not appear, double-click Autorun.exe from the root folder of the Laserfiche Workflow Installation CD.
 - Downloaded Workflow from the Laserfiche Support Site, and double-click Autorun.exe.
- Insert the Laserfiche Workflow Installation CD into your computer. A
- Optional: If you are migrating workflows from Workflow 8.0, we recommend you read the Migration Guide at this point in the installation to familiarize yourself with the migration process. To avoid disrupting any running 8.0 workflows, install Workflow 10 and configure your Workflow Server and Subscriber before running the Migration Utility.
- Select Install Laserfiche Workflow.
- In the installation wizard's Welcome step, click Next.
- Read the terms of the End-User License Agreement. If you agree, select I accept the terms in the License Agreement and click Next.
- In the Choose Setup Type step, select a setup type. Selecting Designer will install the Workflow Designer and Workflow Administration Console. Selecting Complete will install all components. Selecting Custom enables you to configure which components are installed and where you want Workflow to be installed, including language packs. Learn more about the setup types.
- Optional: To install the 32-bit version of Workflow, select the Install 32-bit version check box. Click Next.
- Optional: If you selected the Custom install option:
- Select the components and/or language packs you want to install in the Custom Setup step.
- Optional: Configure where the Workflow features will be installed, next to Install directory.
- Optional: Click Disk Usage to see how much space is available on the specified disk and how much space the Workflow installation requires.
- Click Next.
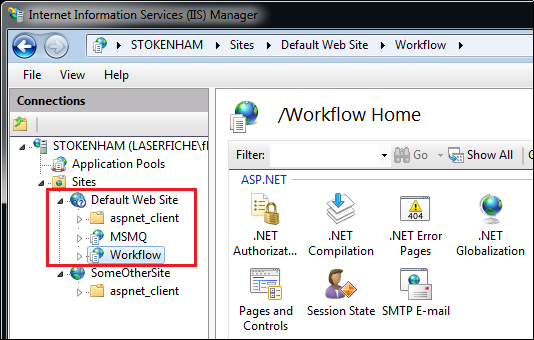
- If you chose to install the Workflow Web Service or Workflow Web and there are multiple sites in IIS, the IIS Options step lets you choose whether to install the Workflow components under the default website (as specified in your IIS Manager) or a different website. This website is the place from which Laserfiche will create applications for its different programs. For example, if your default website is located at http://CompanyABC, then Workflow will create its Web service at http://CompanyABC/workflow and the Laserfiche web client would be at http://CompanyABC/laserfiche. For most installations, the default IIS website is sufficient.
- The components that will be installed will be listed in the Ready to Install step. You can also choose to:
- Create desktop shortcuts: If you are installing the Workflow Designer and the Workflow Administration Console, select this option to place shortcuts to these components on your desktop.
- Create a Windows Firewall exception: Depending on your Windows settings, Windows Firewall may automatically block port 8085, which the Workflow Server uses to communicate with other Workflow components. Check this option to ensure that Windows Firewall does not block Workflow.
- Click Install.
- On the Prerequisites page, ensure that the listed components are installed. Workflow will automatically install .NET Framework if it is not already installed. Click Run. Learn more about installing IIS Components and Microsoft Message Queuing.
Note: You must restart the machine after installing .NET Framework.
- A green check
 will appear next to installed items and a red X
  will appear next to items that have not been installed.
 - If one or more of the items on the list has a red X next to it, install that item and then click Retry. Alternatively, select Bypass Prerequisites and click Next.
- If all the items installed successfully, click Next.
- If you are installing the Workflow Web Service, some IIS features may need to be reset. If this is the case, a warning dialog box may appear. Click OK to continue the install.
- The Installing Laserfiche Workflow 10 step will show you the progress of your Workflow installation.
- If the Product Enrichment Program has not already been configured on this computer, you will be prompted to participate in the program. More information.
- At the end of the installation, select if you want to open the Readme file and/or launch the Workflow Configuration Manager (where you can configure the Workflow Server, Subscriber, Monitored Repositories, Email Servers, Trustee Directories, and the Workflow Web Service).
- Click Finish.
Important: Do not configure any Workflow monitored repositories until after you run the Migration Utility.
Note: You must at least install the Workflow Service, Workflow Subscriber, and Workflow Designer before you will be able to use Workflow. However, these components do not need to be installed on the same machine. Learn more about installing the Workflow Server and Subscriber on different computers.
Note: If you install Workflow components (the Designer, Subscriber, and/or Administration Console) on a different machine than the Workflow Server, you must have domain authentication within your network to let those components connect to the Workflow Server.
Tip: You may want to install a 32-bit version of Workflow on a machine with a 64-bit version of Windows if you have (or plan to have) custom activities that reference third-party libraries that only have x86 versions.
Note: The IIS Options step is only available if you chose to do a custom installation.
Important: Bypassing prerequisites may cause Workflow to function incorrectly and is not recommended.
Note: You must configure the Workflow Server, Workflow Subscriber, and Monitored Repositories before you will be able to use Workflow. These components can be configured in the Workflow Configuration Manager.